Light pad Photography 5 easy steps
Capturing flowers in natural light is one of my favorite things to do with my camera. It’s magical how the soft, natural light highlights the petals' delicate, almost translucent qualities. I’ve spent countless hours photographing flowers outdoors, chasing the perfect light. But when natural light is scarce in winter, I discovered a simple solution: a light tracing pad. This accessible tool mimics natural light, creating the same ethereal effect indoors. In this post, I’ll show you how to use it to achieve dreamy, luminous flower photography, even on the darkest days.
Here are 5 easy steps to get you started!
Step 1: Gather your equipment
Light tracking pads can be found online or at local art stores. They range in price, and I recommend starting with a small, inexpensive one. If you enjoy this process, you can then upgrade.
Any camera will work for this type of photography. Lens choice is also up to you. Shooting with a 24-100mm lens will give you variety in the focal distance, or you can use a macro lens. A Lensbaby lens will provide you with even more creativity.

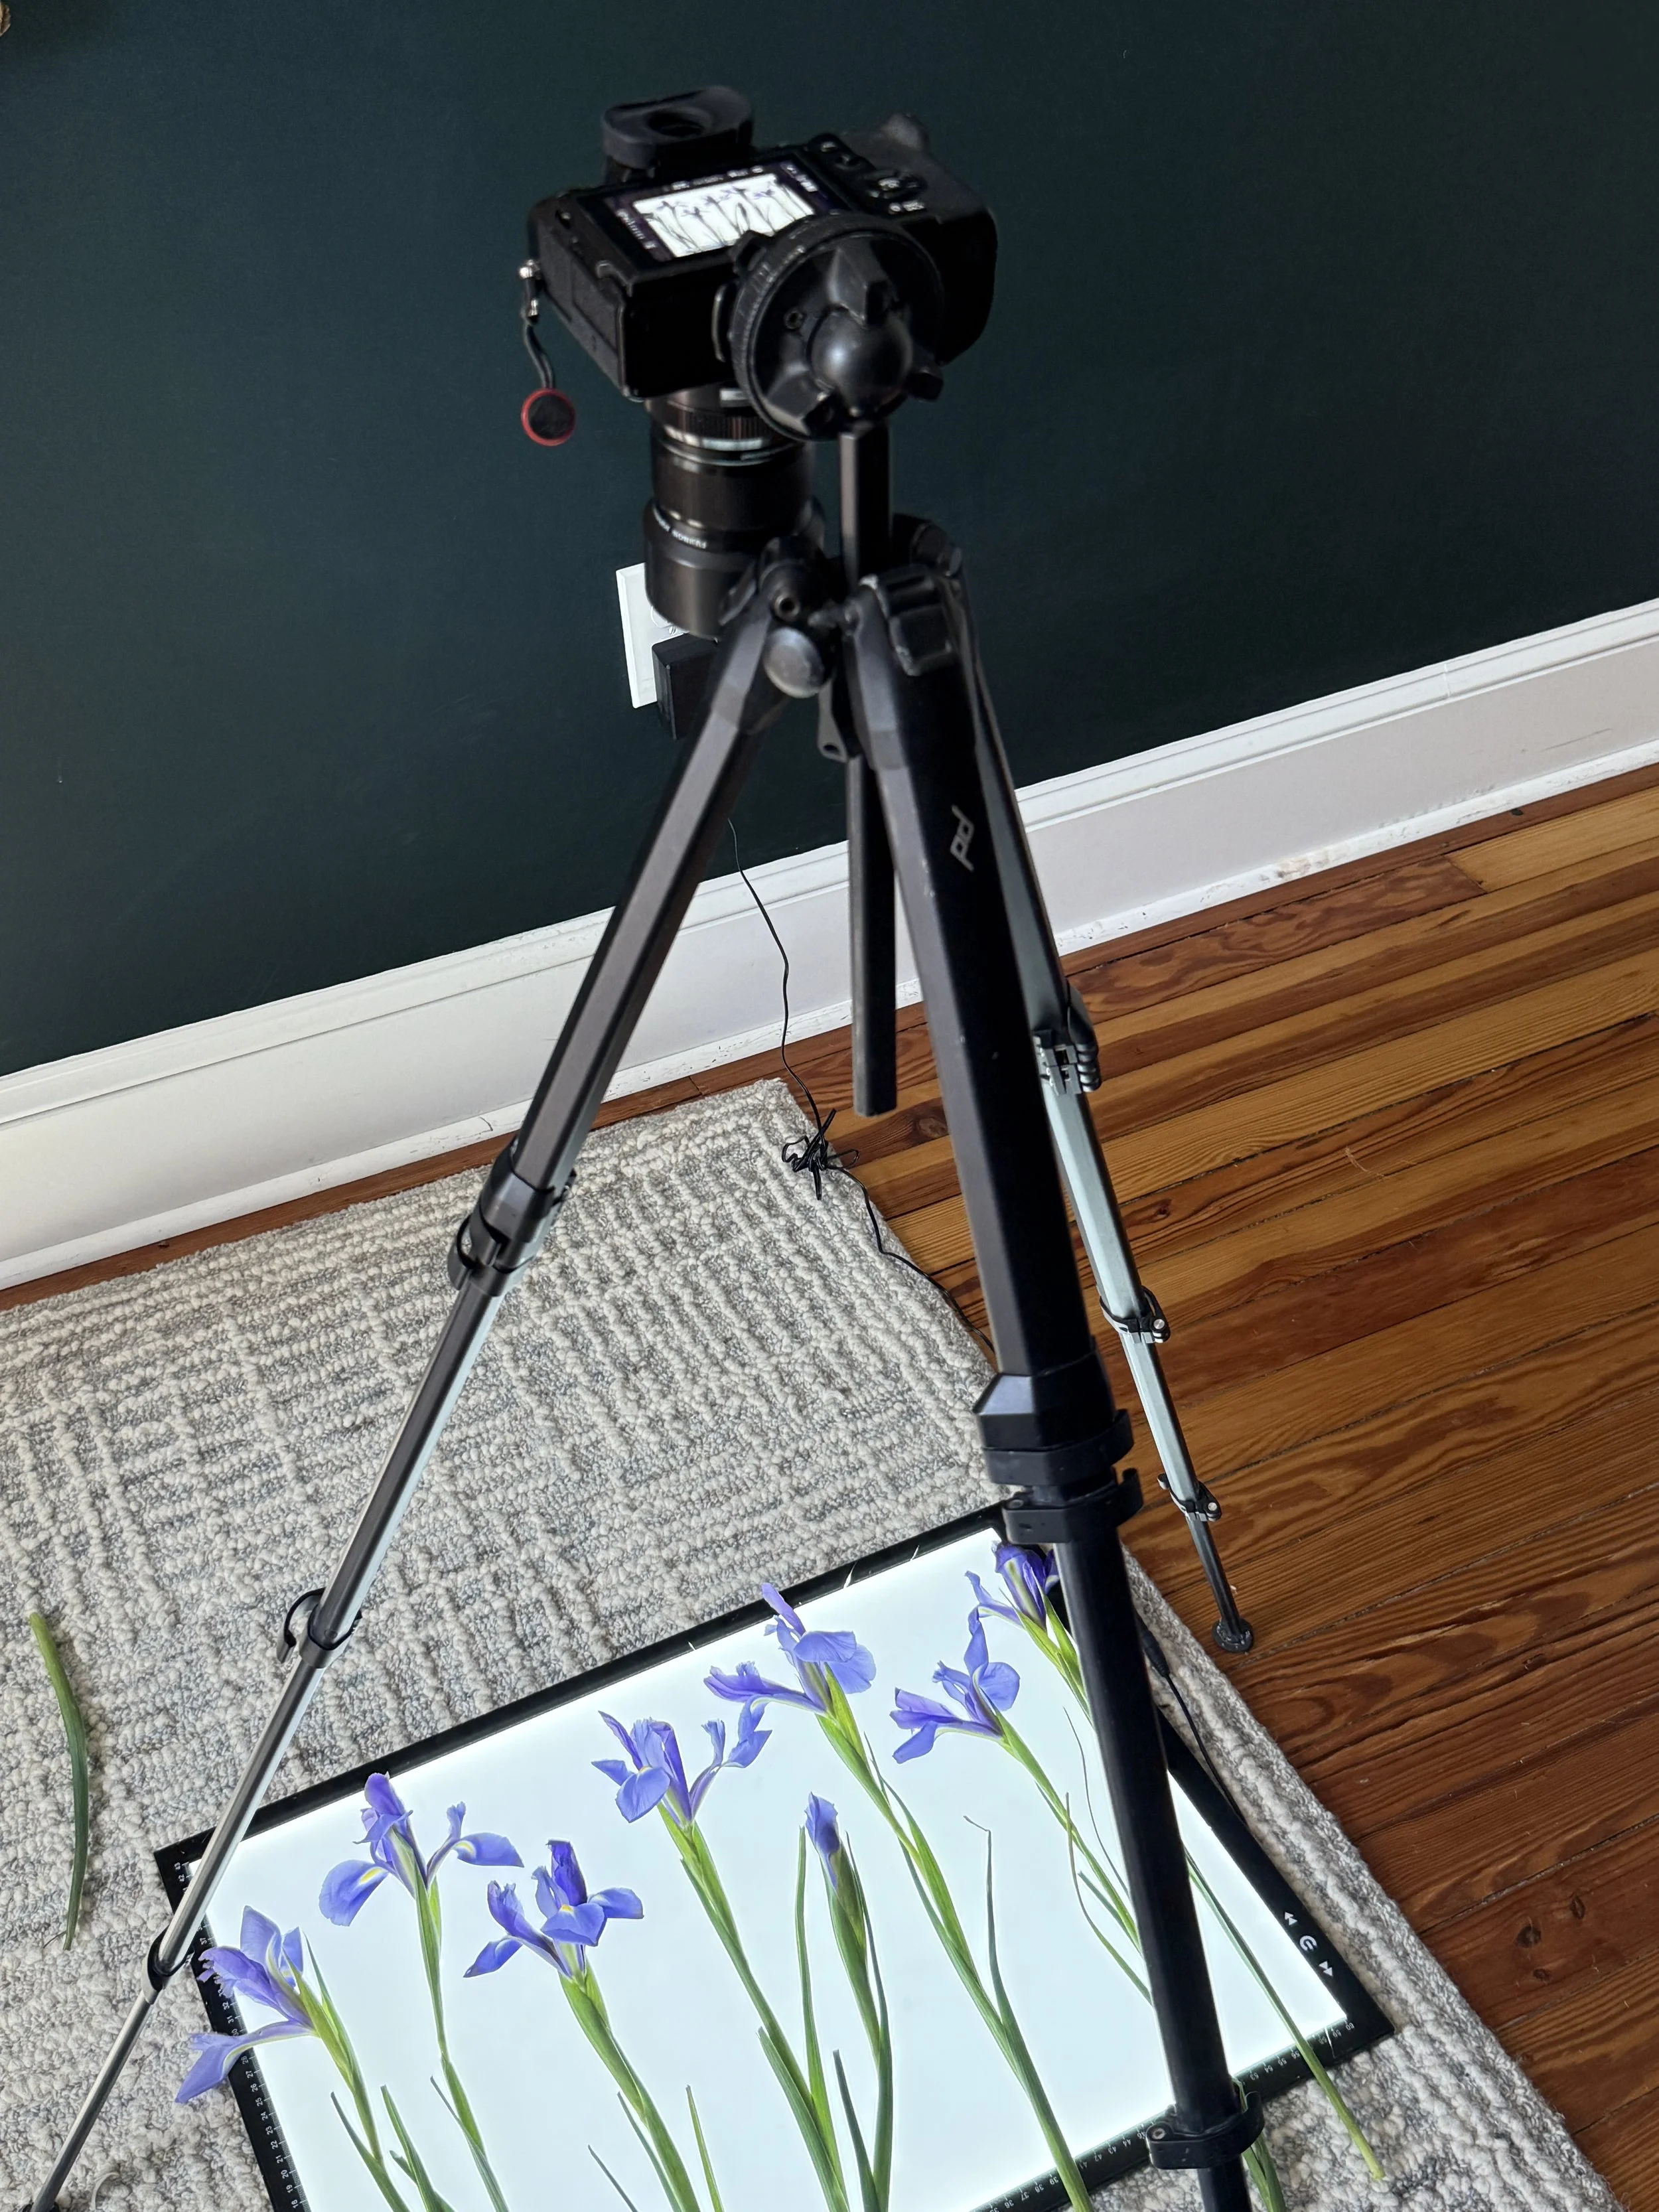
A tripod is necessary! It will ensure you can take a longer exposure, get the image in focus, and allow you to shoot straight down. You want to set up as if you were shooting a flat setup - so have your camera head facing straight down to the light pad
.
Step 2: What should you photograph?
What to capture is the fun, creative part! You can photograph fresh flowers, dried flowers, seedpods, sliced fruit, berries, and leaves. You do want to select a subject that is naturally a little translucent. To test translucency, hold the subject up to the light. It will be a great subject if you can see a little light coming through. Darker subjects do not have as much transparency and may require additional light to get a great shot.
Step 3: Set up your photoshoot
Set up your light pad on a stable work surface in a room with bright natural light. Working in a room with windows or a doorway lets extra light in and will help you get the proper exposure. I like to set my light pad on the floor and then stand with my tripod to shoot.
Place a test subject on the light pad to set up your tripod. Adjust your tripod as needed based on your lens focal length.
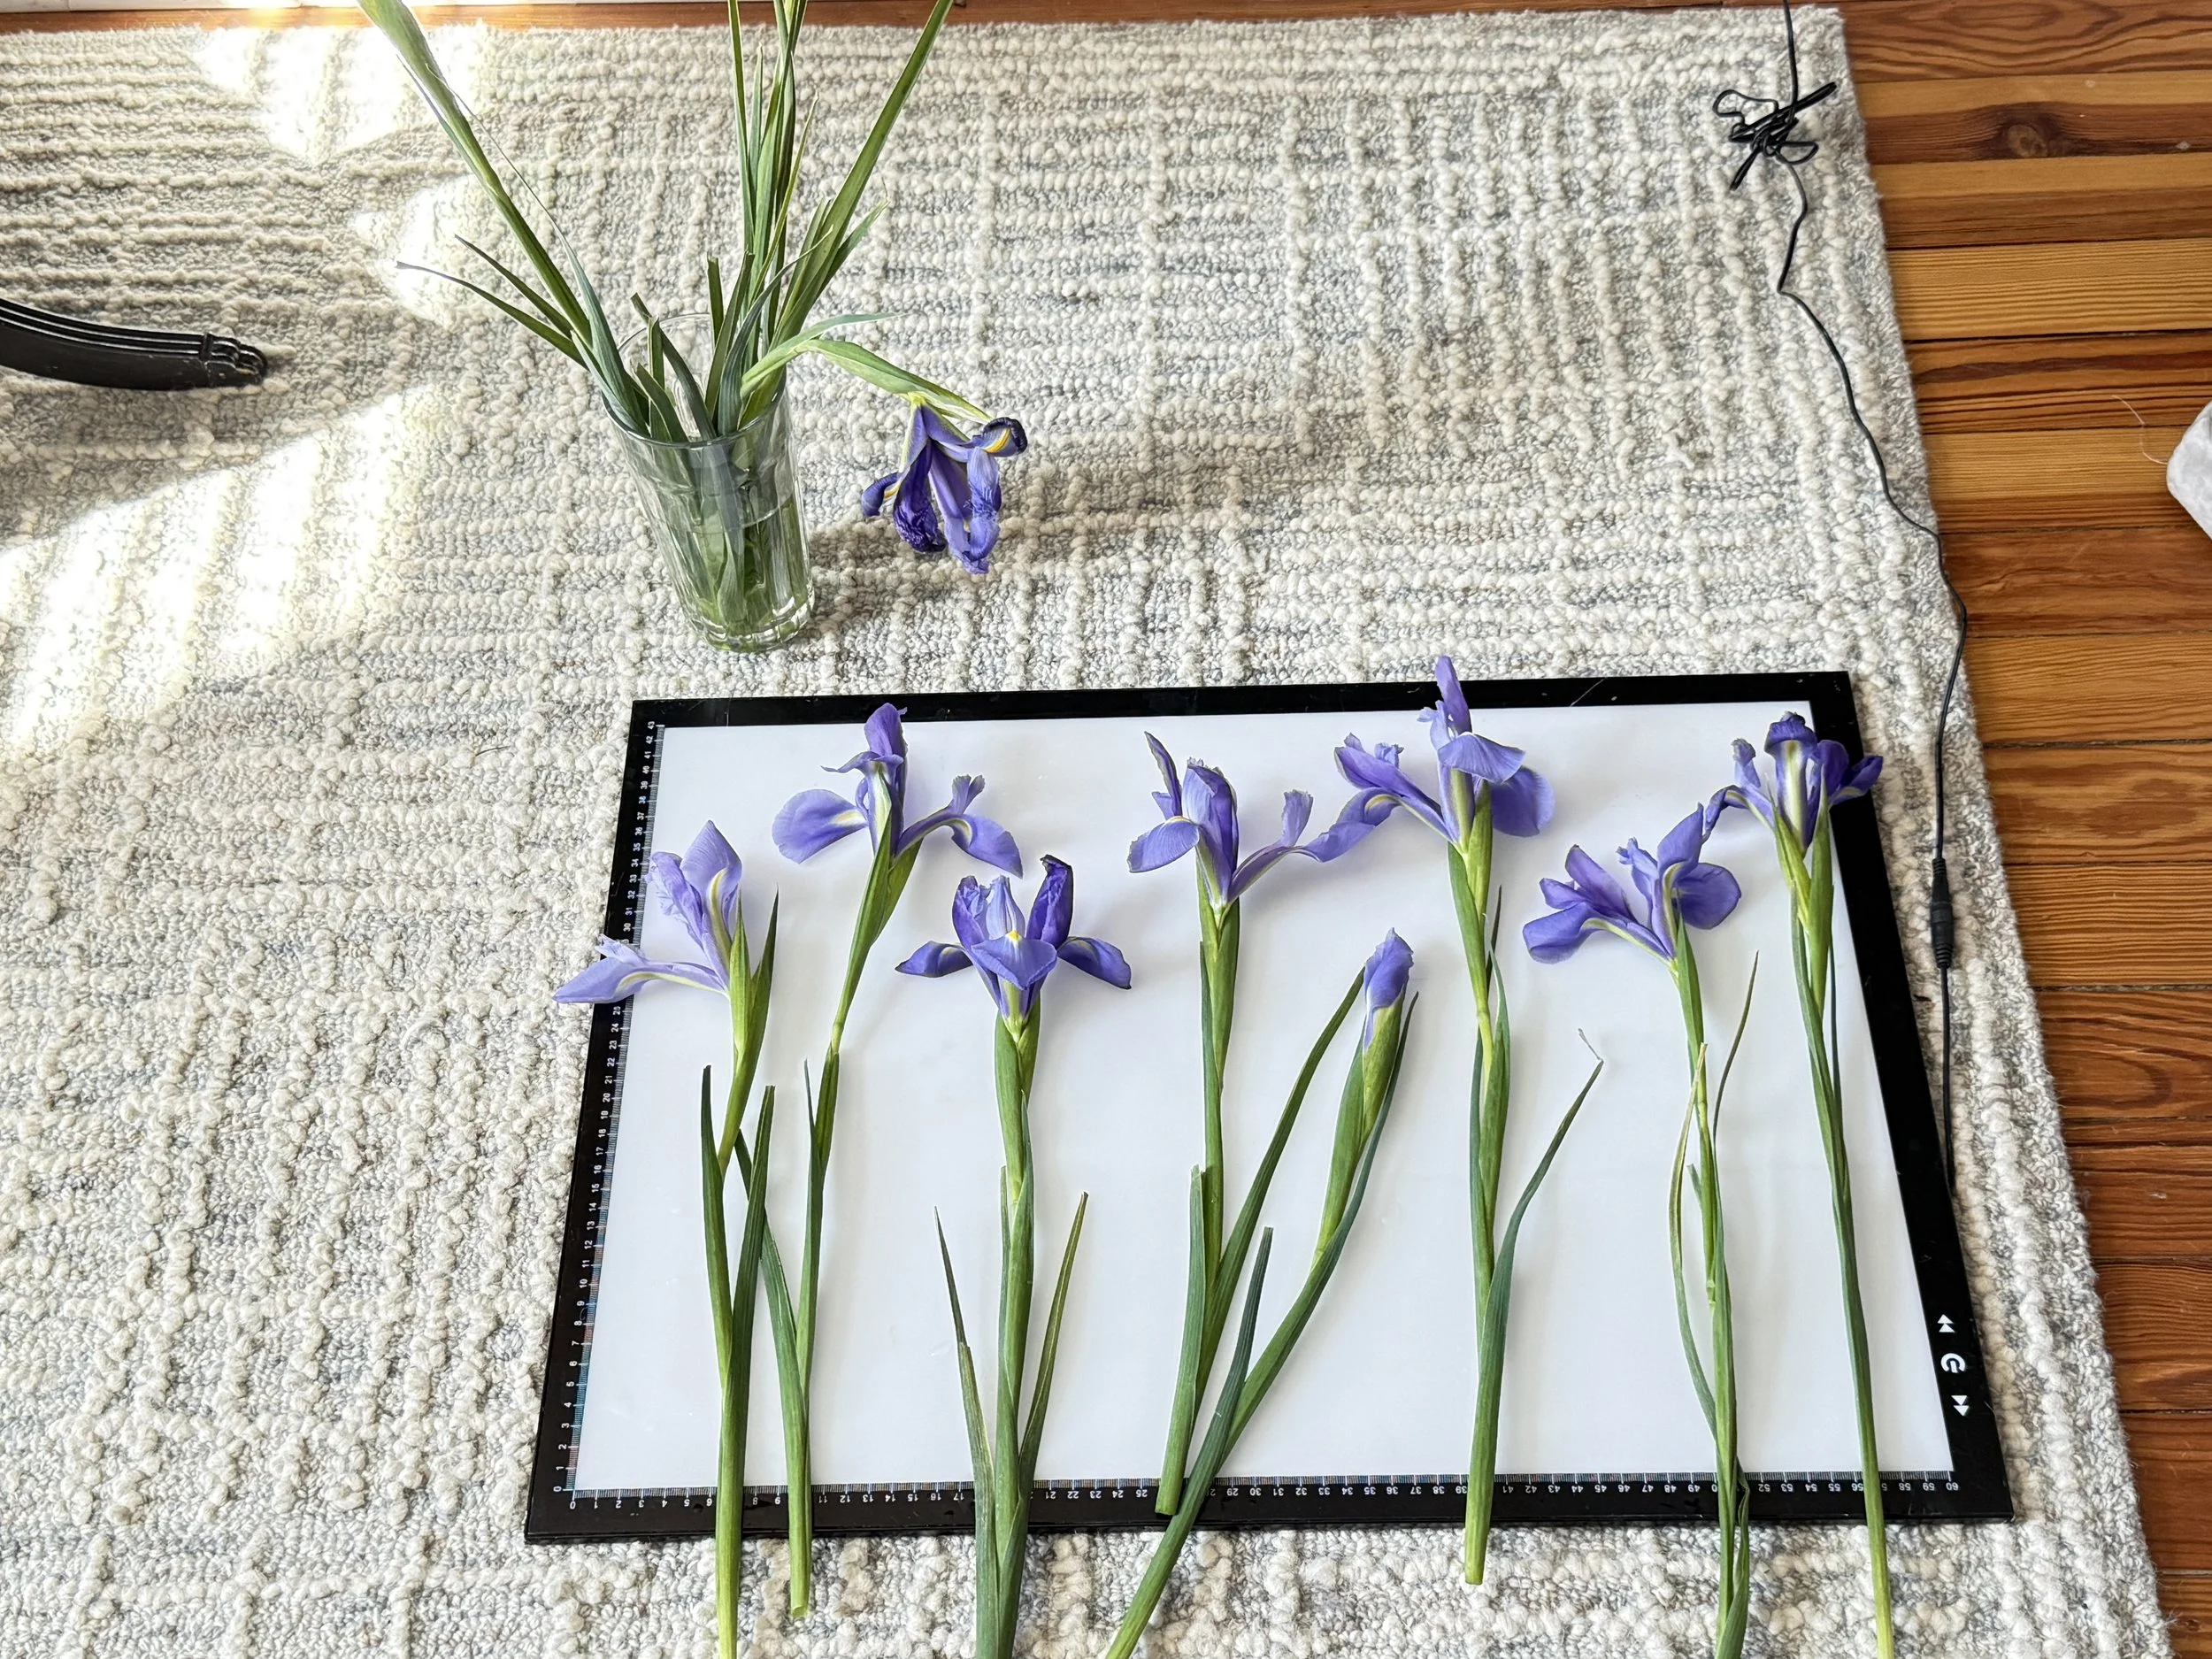
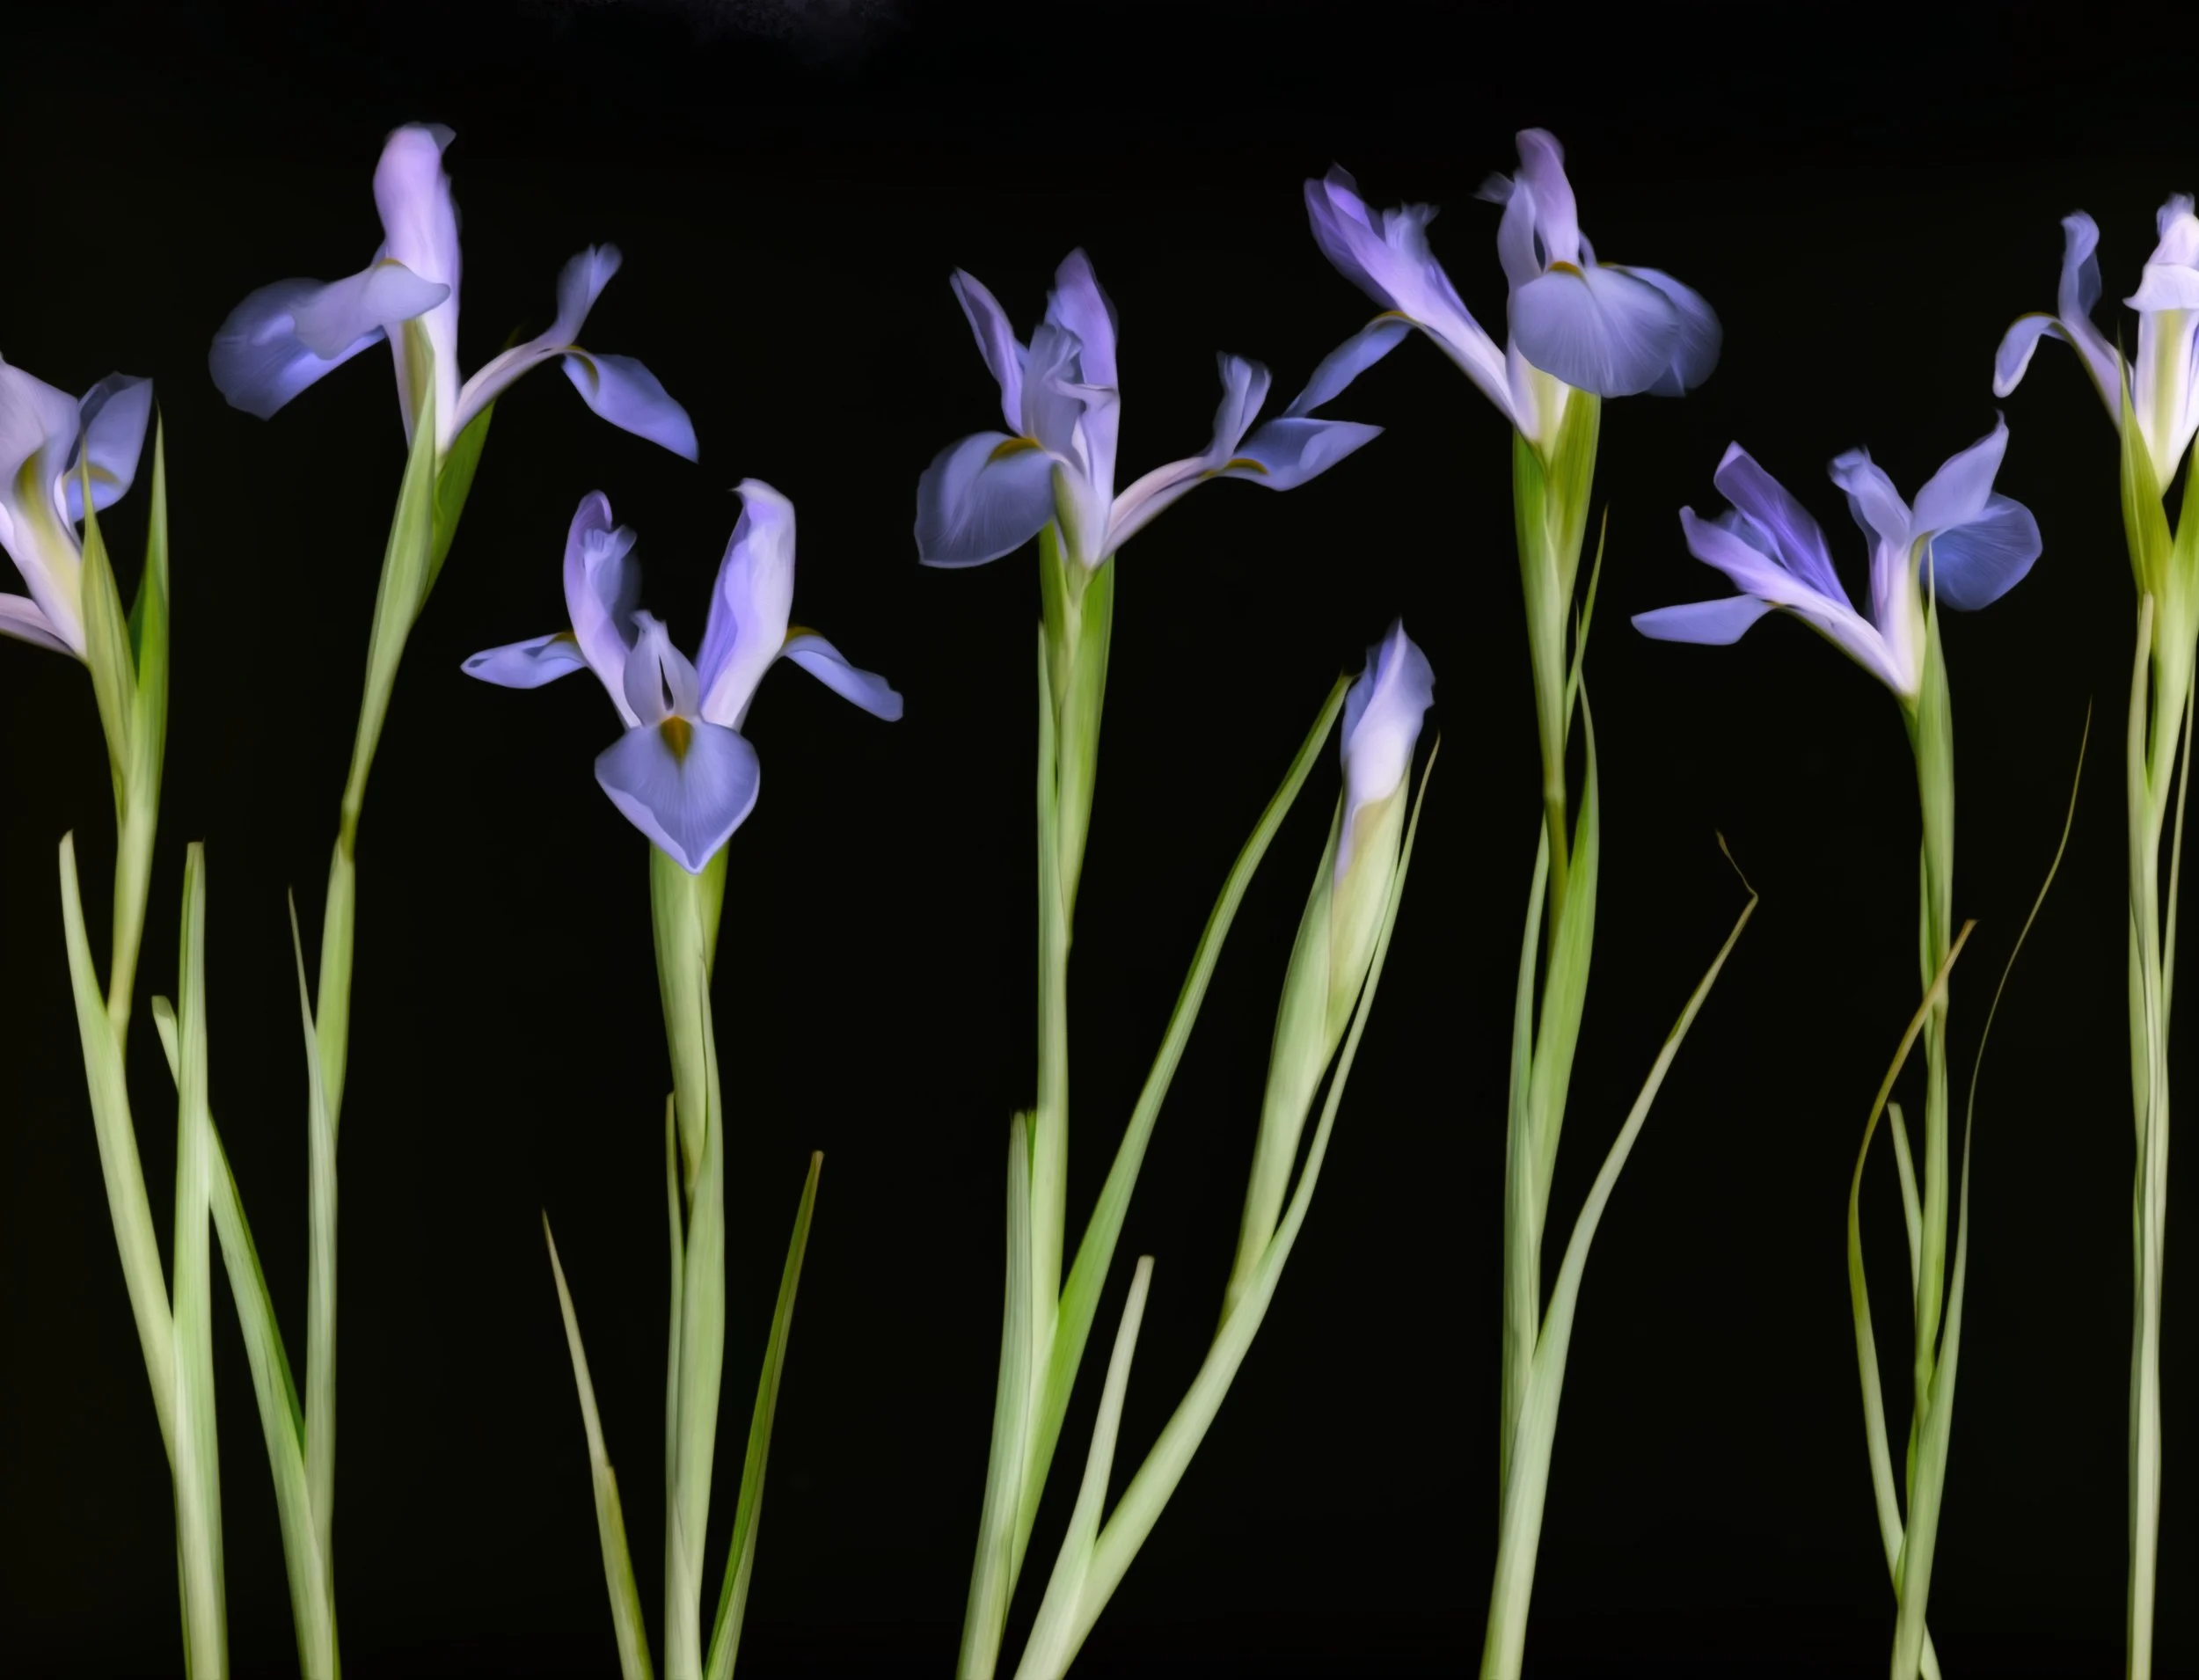
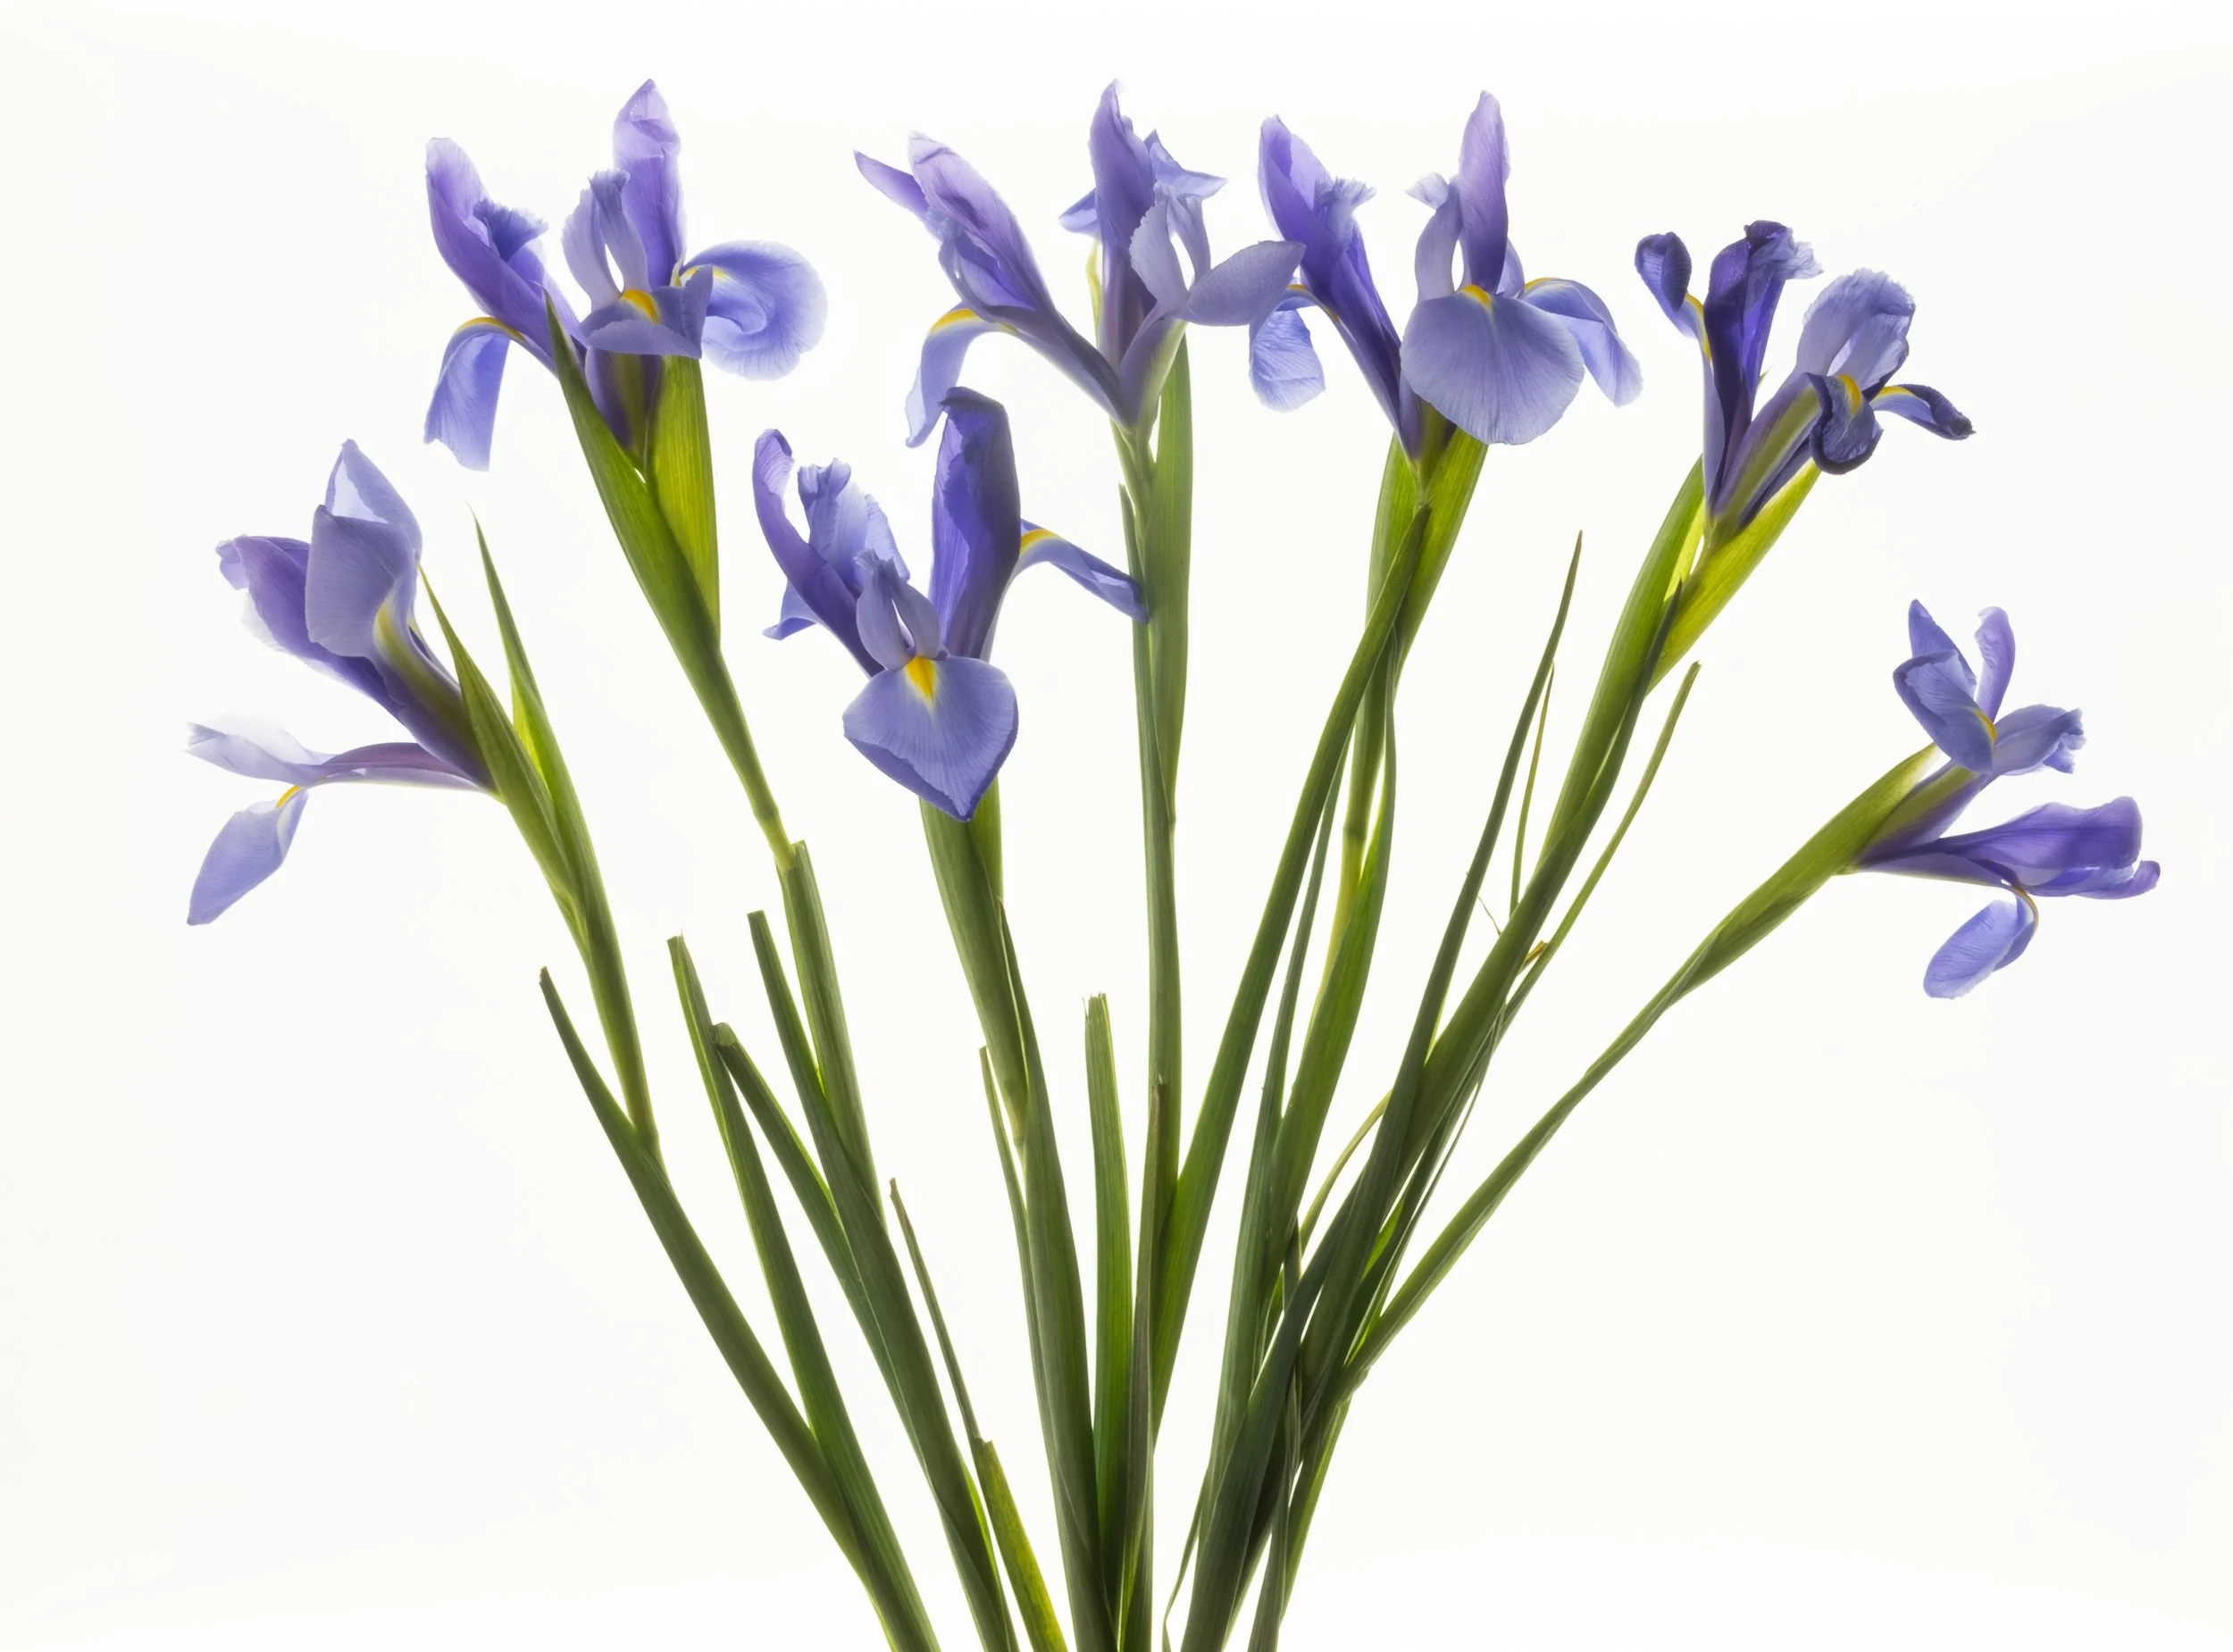
Arrange the Flowers
Once your equipment is in place, arrange your subject on the light tracing pad. You can start with a single flower or get creative with your display. I like to place the flowers like a floral bouquet on the light pad or place them as they would be viewed growing in the garden. You can try different setups and see what works best for you.
Step 4: Capture the images and overexpose them!
I recommend shooting manually and adjusting the shutter speed to get the best pictures. I like to use my exposure compensation settings to adjust +3, +2, and then +1. The additional recommended settings are an ISO of 100, an F11-F16 aperture to get lots of detail, and a shutter speed of .5 sec to 1 sec. Shutter speed will have to vary based on the light in your room, the strength of your light pad light, and the color of your subject.
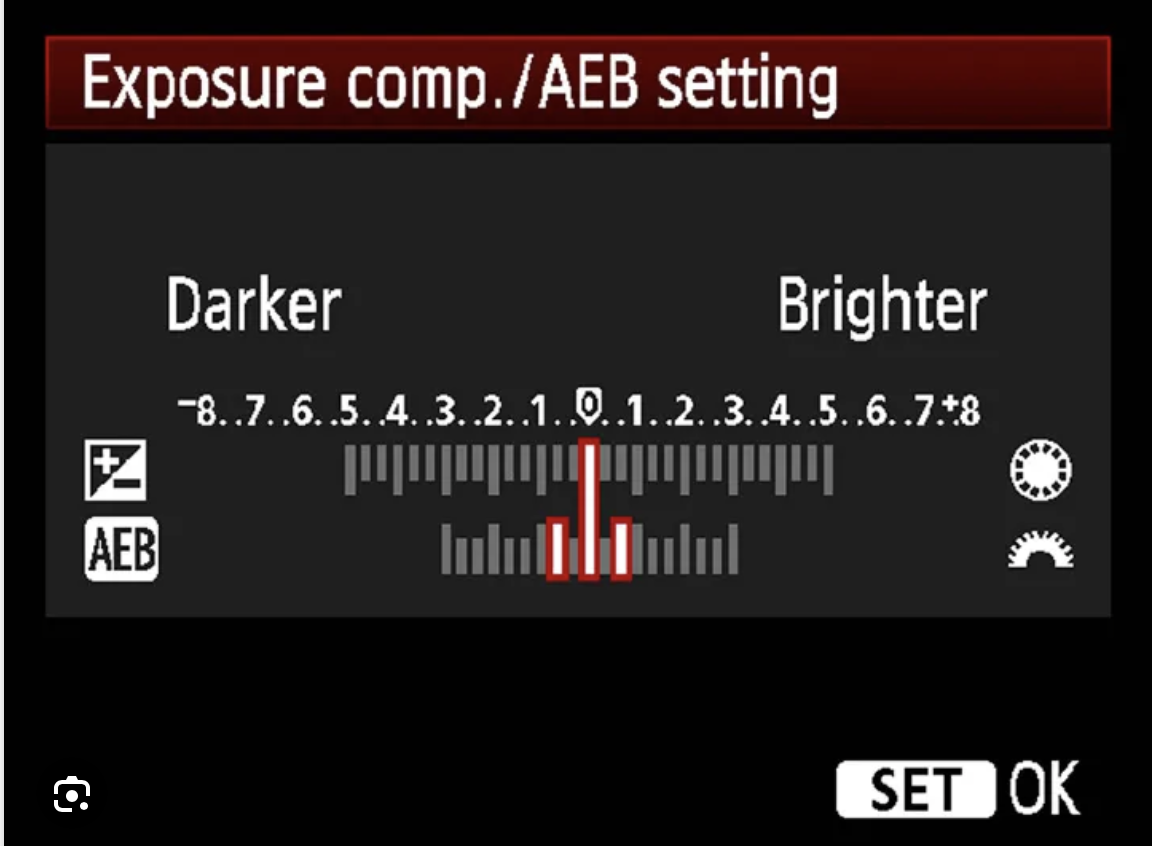
The key is to overexpose the images by 2 - 3 stops to bring out the translucent quality of the flower as much as you can. You will want the exposure to be very bright. I like to capture one image overexposed by two stops and then another by three stops. You can combine the photos in post-processing to get a nice balanced exposure. You may need to add extra light if you capture a dark flower, like a red rose. You can use a lamp or flash to pop the brightness on the top of the flower.
Step 5: Editing these images is a breeze!
If you want a simple edit, the two-stop overexposed image is a great place to start. Pop the whites more if needed, add some contrast and work with your colors. Add texture to make them even more creative.
If you are comfortable using Photoshop, you can combine the images. I like to blend the images, using the three-stop overexposed image to mask extra brightness. You can also add creative elements like an oil paint filter, Photoshop brushes, or even multiple the images for a creative artistic look.
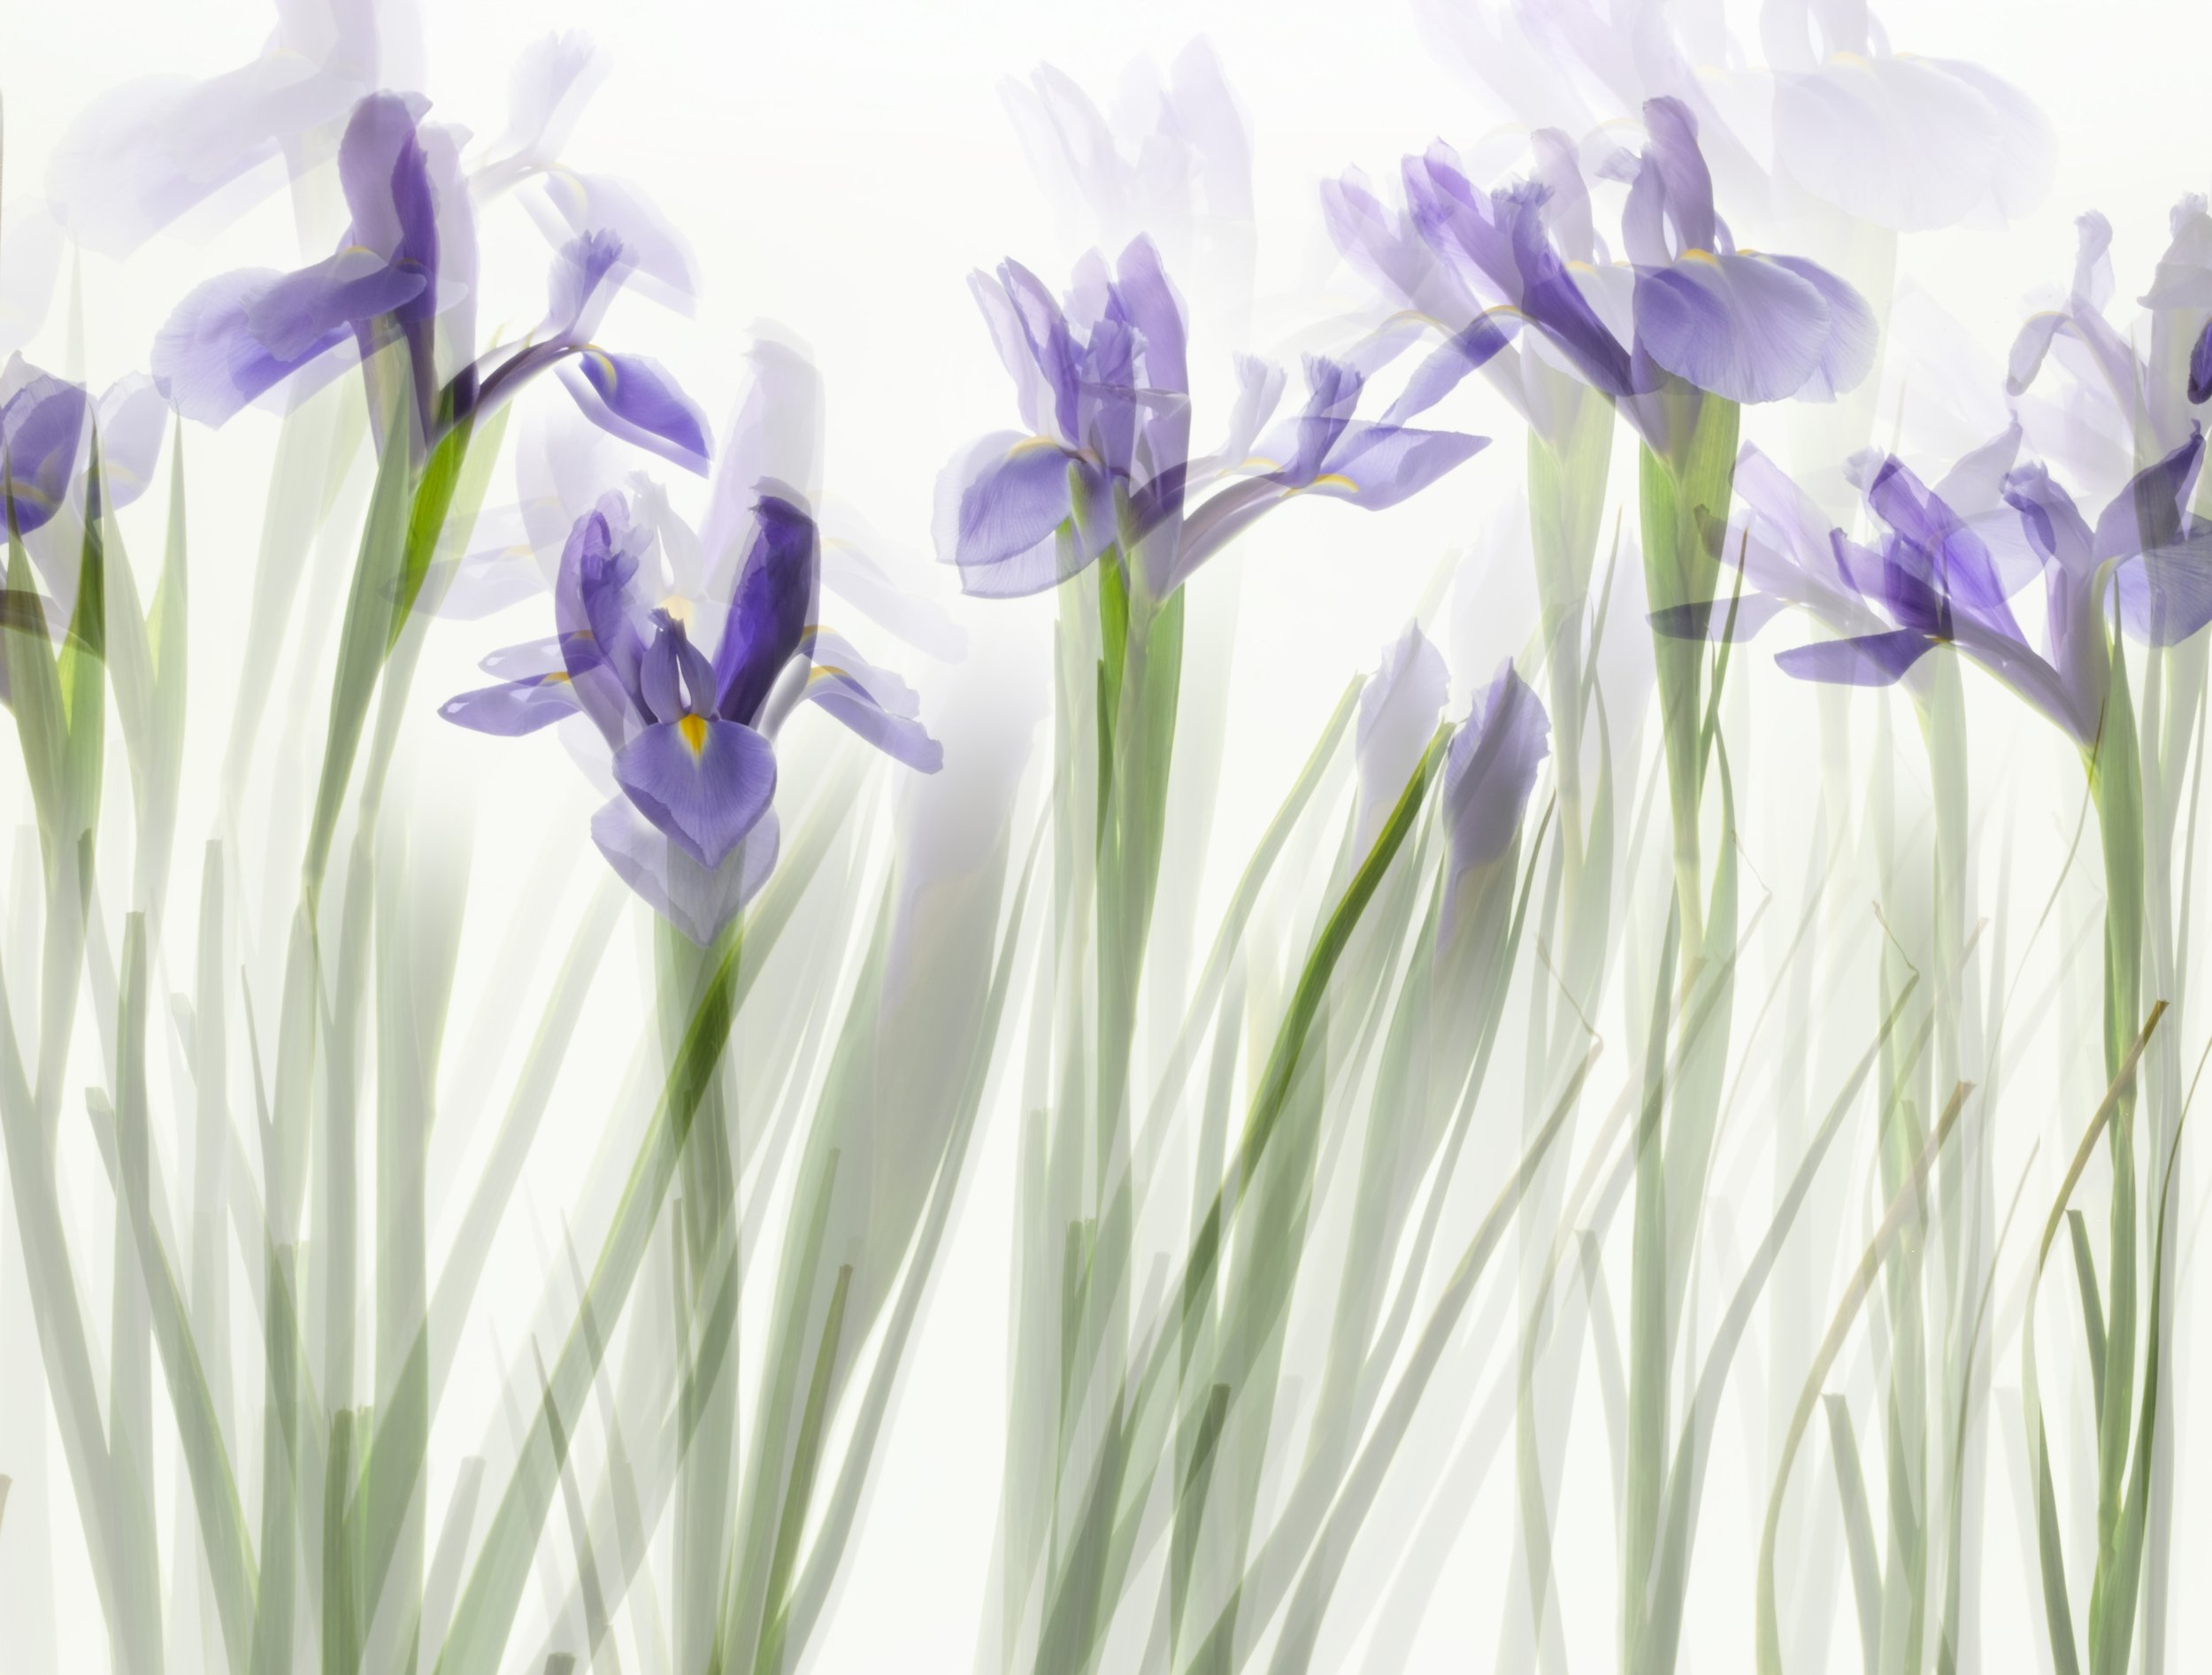
Capturing flowers, seeds, and fruit on a light pad makes a great rainy or winter day photography project. Enjoy playing with compositions and capturing the translucent quality of your subject.
For more details on using a Lightpad in your photography, enroll in my self-study course Mastering the Art of Light Pad Photography with Flowers: A Step-by-Step Guide for a deeper dive into the world of Light Pad Photography.